

Machine Embroidery Digitizing – The Simple Way to Get Clean, Beautiful Stitch Designs
Machine Embroidery Digitizing is something I work with every single day, and it’s the first step you need if you want your artwork to stitch perfectly. When I talk to clients, I always tell them the same thing: if you want clean lines, smooth fills, and zero problems during stitching, you must start with the right digitizing. And trust me, you’ll notice a huge difference the moment you switch from random files to professional work.
When you send your design to a machine, the machine doesn’t see art. It only sees stitches. That’s why Machine Embroidery Digitizing matters so much. It tells the machine where to start, where to stop, how dense the stitches should be, how the fabric will move, and how each thread needs to behave. Without this, your embroidery would look messy, uneven, or distorted. With it, your design looks sharp and clean.
I love helping people understand this because once you get it, everything becomes easier. And that’s exactly what I want for you.
Why Custom Embroidery Digitizing Makes a Huge Difference
When I digitize a design, I look closely at every small detail. I think about how the fabric will react, how the threads will sit, and how the stitches will stretch. This is why Custom Embroidery Digitizing gives you the best outcome. Instead of using a one-size-fits-all method, I create a file that fits the design, the fabric, and the purpose.
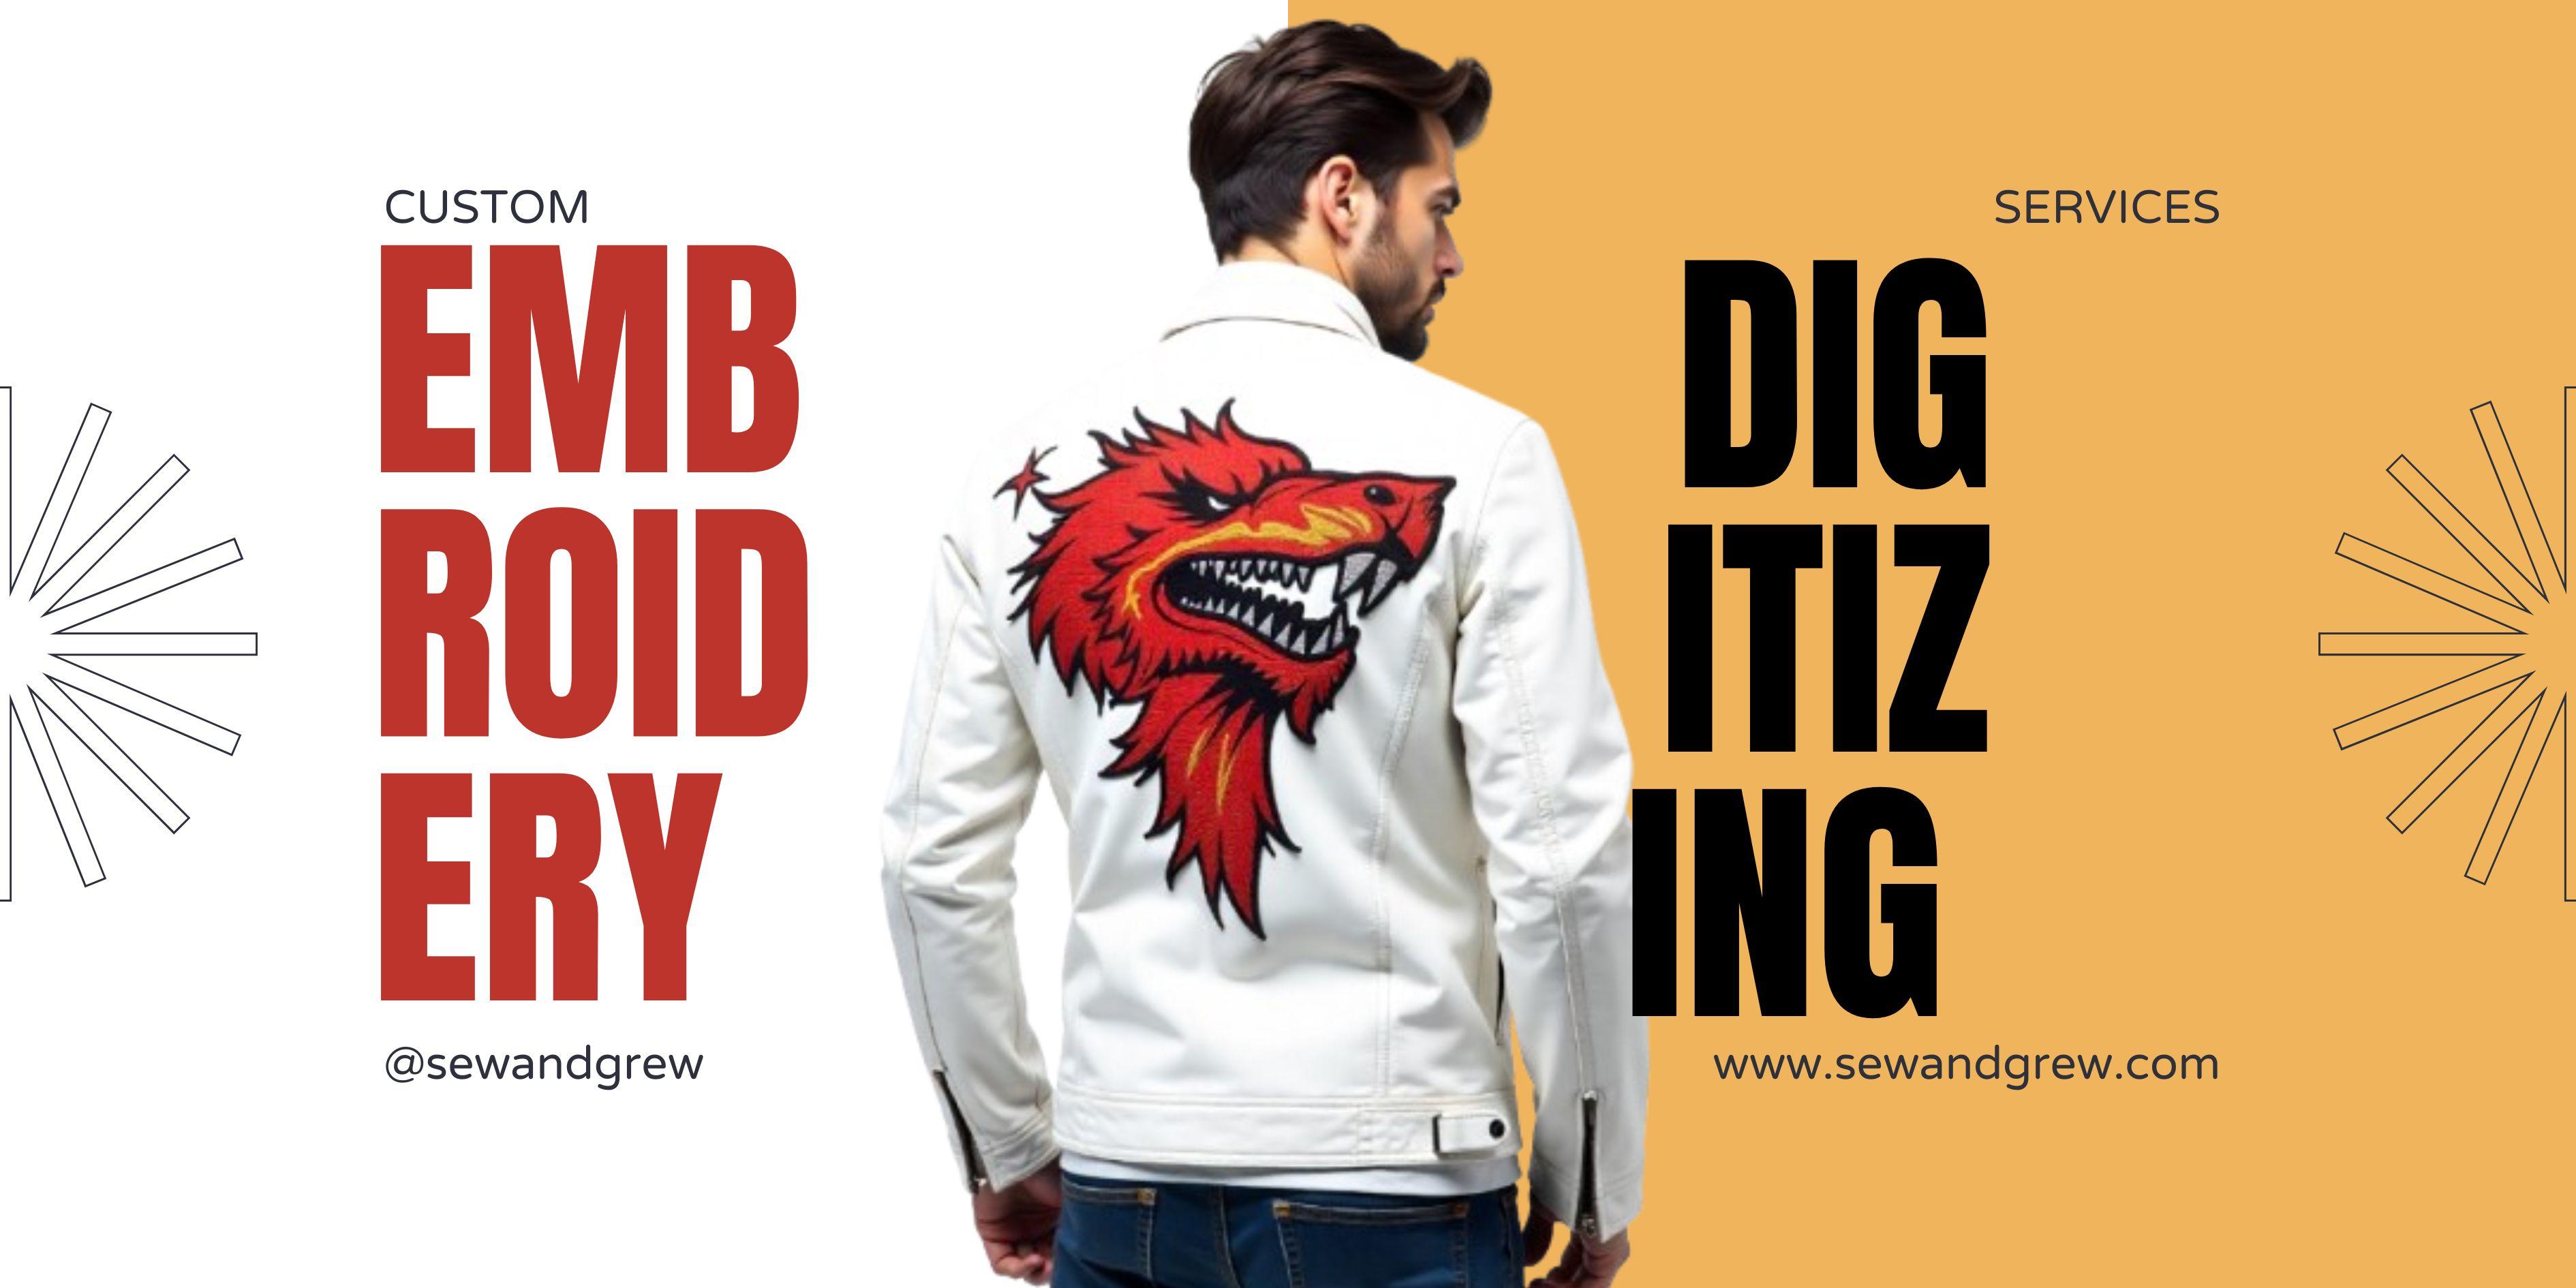
If you’re using stretchy fabric, I adjust the underlay. If you’re sewing a jacket back, I build the stitches so they stay smooth and bold. If you’re working with small letters, I change the stitch type so everything stays readable. This is the magic of custom work. It gives you exactly what you need instead of making you settle for something close.
And let me tell you, nothing feels better than watching your machine run a perfectly digitized design with zero stress, zero breaks, and zero surprises.
How I Create Better Stitch Files Using the Best Tools
Many people ask me what tools I use. The truth is, the Best Embroidery Digitizing Software helps a lot, but the software is only part of the process. The real skill comes from understanding how stitches behave. You can give someone the best program in the world, but without knowledge, the design still won’t stitch well.
I use advanced software because it allows me to edit, resize, adjust stitch angles, create layers, control pull compensation, and fix distortion before it even happens. But even then, I still rely on my skills and experience. Good digitizing is part art and part science. The software gives me precision, but my hands and eyes give the design life.
This combination is what makes your embroidery look clean and professional.
The Process I Follow for Machine Embroidery Digitizing
Whenever I digitize a design, I follow a clear process to ensure everything runs smoothly for you.
I start by studying the artwork. I decide which areas need satin stitches, where I should use fill, and where small details might need special treatment. Then I build the foundation with underlay. This is what keeps the design from shifting or puckering. After that, I map out stitch angles and density. This prevents uneven fills and thread breaks. Finally, I check every corner, every curve, and every small spot to make sure the results will be smooth.
My goal is simple: I want you to load the file in your machine and watch it stitch perfectly from start to finish.
Why Choosing the Right Digitizer Matters More Than You Think
A lot of people try cheap or auto-digitized files first because they don’t realize how important digitizing is. But once they see gaps, messy stitching, or broken outlines, they come back looking for something better. And that’s when they realize the difference between a quick file and a well-crafted one.
A good digitizer saves you time, money, thread, fabric, and frustration. When your design runs cleanly, your customers get better quality. Your machine works easier. And you enjoy embroidery instead of fighting with it.
I always tell people: you’re not just paying for stitches, you’re paying for peace of mind.
Where Custom Embroidery Digitizing Can Be Used
Custom digitizing can be used for almost anything. I help people digitize logos for uniforms, detailed artwork for jacket backs, small text for hats, bold shapes for patches, and even artistic designs for custom clothing brands. When you use proper digitizing, your work looks professional. People notice. And that’s how you grow your brand.
Big designs, small designs, simple shapes, or advanced artwork, everything becomes easier when your digitizing is done right.
How the Best Embroidery Digitizing Software Helps Me Deliver Faster
Good software helps me work faster without losing quality. It speeds up editing, resizing, and adjusting every stitch. It also lets me export files for almost any embroidery machine. Whether you're using DST, PES, EXP, HUS, JEF, VP3, or another format, I can deliver exactly what you need.
But no matter how good the software is, I always double-check everything. Because the best results come from a mix of great tools and great skill.
Final Thoughts
Machine Embroidery Digitizing is more than a step in the process, it’s the heart of perfect stitching. When you choose custom work, your designs run smoother. Your lines stay clean. Your fills look full. And your embroidery becomes something you can proudly show clients and customers.
With the right balance of Machine Embroidery Digitizing, Custom Embroidery Digitizing, and the Best Embroidery Digitizing Software, your designs get the quality they deserve. And I’m always here to help you create stitch files that look amazing and run beautifully on any fabric or machine.
Author Bio – Sew And Grew
I specialize in professional machine embroidery digitizing, helping brands, shops, and creators get clean, smooth, and reliable stitch files for every project. My goal is to make your embroidery look beautiful and run perfectly every time.
Contact: designs@sewandgrew.com